When these steps are done, you’ll only need to enter the passphrase of the SSH key(s) once when Windows boots, instead of each time Git wants to communicate with the remote repository.
By the way: Much of what is witten here assumes that one is using Microsoft Windows and Powershell!
General information
-
The Secure Shell (SSH) Protocol) is a cryptographic network protocol for operating e.g. network services in a secure way over an unsecured network connection. Its most notable use cases are remote login and remote command-line execution.
-
SSH-2 private keys have no standard format: For example, OpenSSH, ssh.com and PuTTY (*.ppk) all have different formats. So a key generated with one client cannot immediately be used with another client — but it is sometimes possible to convert or import different formats with different clients…
-
A SSH agent allows that one must only enter the passphrase for the key once per session: The agent imports and decrypts the key once and stores it for the remaining time of a session (= until the agent software or the computer runs). [TODO] OpenSSH Agent: Zus. Service unter Windows?
-
Besides using SSH for pushing and pulling changes to a version controlled repository, one can also use it for simply opening a CLI connection to a remote server:
  > ssh <ConnectionInfo>
  >   ...
  > exit
  Connection to <Server> closed.
Get the software
OpenSSH on Windows
OpenSSH-based client and server programs have been included in Windows since Windows 10, version 1803.
The following commands are built-in (OpenSSH for Windows overview):
sshis the SSH client component that runs on the user’s local systemsshdis the SSH server component that must be running on the system being managed remotelyssh-keygengenerates, manages and converts authentication keys for SSHssh-agentstores private keys used for public key authenticationssh-addadds private keys to the list allowed by the serverssh-keyscanaids in collecting the public SSH host keys from hostssftpis the service that provides the Secure File Transfer Protocol, and runs over SSHscpis a file copy utility that runs on SSH
The OpenSSH for Windows client and key agent should be available and enabled by default;
check the status on a CLI via ssh or ssh -V.
The OpenSSH for Windows server is an optional Feature-on-Demand; 👉 see How to install OpenSSH Server on Windows with Powershell for details.
PuTTY (Windows)
PuTTY is a free SSH/Telnet client; and while “PuTTY” itself is not that interesting at the moment, the programs that come bundled with it are:
puttygen.exe: The PuTTY Key Generatorpageant.exe: The PuTTY Authentication Agentplink.exe: PuTTY Link, a command-line network connection tool
Generate SSH key pair
OpenSSH on Windows
# ssh-keygen -t <Algorithm> -f <Filepath>            -C "<Comment>"
  ssh-keygen -t ed25519     -f $HOME\.ssh\<FILENAME> -C "SSH key for <USER/SYSTEM/PURPOSE>"
# $HOME is an automatic variable in Powershell and allegedly more reliable than using '~' on Windows.
That generates two files: <FILENAME> (the private key) and <FILENAME>.pub (the public key) in the directory $HOME\.ssh.
The parameters are optional (OpenBSD man page):
- If the algorithm or the filepath aren’t specified, default values will be used.
- A descriptive comment is not required (but recommendable).
PuTTY (Windows)
Use PuTTY’s PuTTYgen program to generate a new SSH key pair (a private and a public key) on your local computer:
-
Start PuTTYgen and choose the Type (e.g. RSA) and possibly the Number of bits: 2048 (for example):
By the way: GitLab.com recommends ED25519; for that, select in PuTTYgen (v0.81) as the type of key to generate EdDSA:
“For EdDSA, the only valid sizes are 255 bits (these keys are also known as Ed25519 and are commonly used)”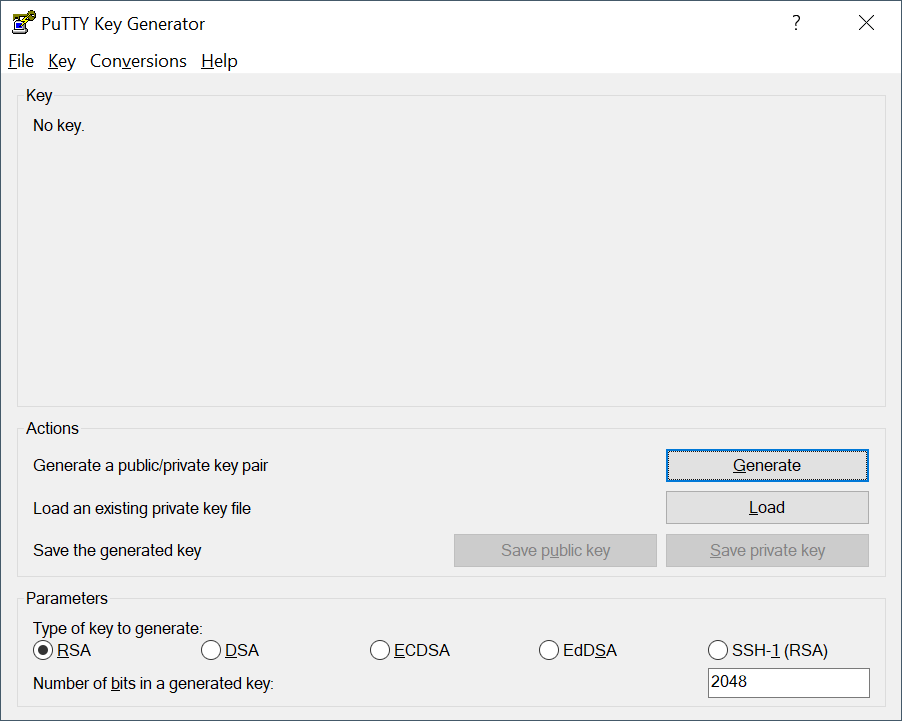
-
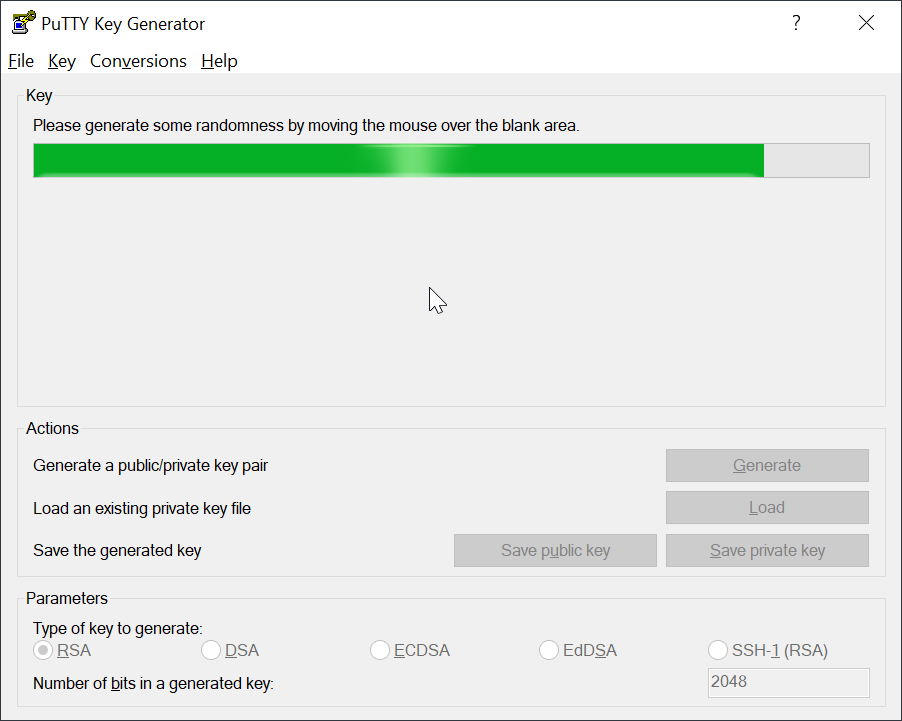
Click on the Generate button and move the mouse cursor over the blank area, until the progress bar is done:
-
Optionally type in a comment (description) for this key and finally enter and confirm a key phrase (a “password”).
Then click on Save private key (to a*.ppkfile; PuTTY’s proprietary file format).
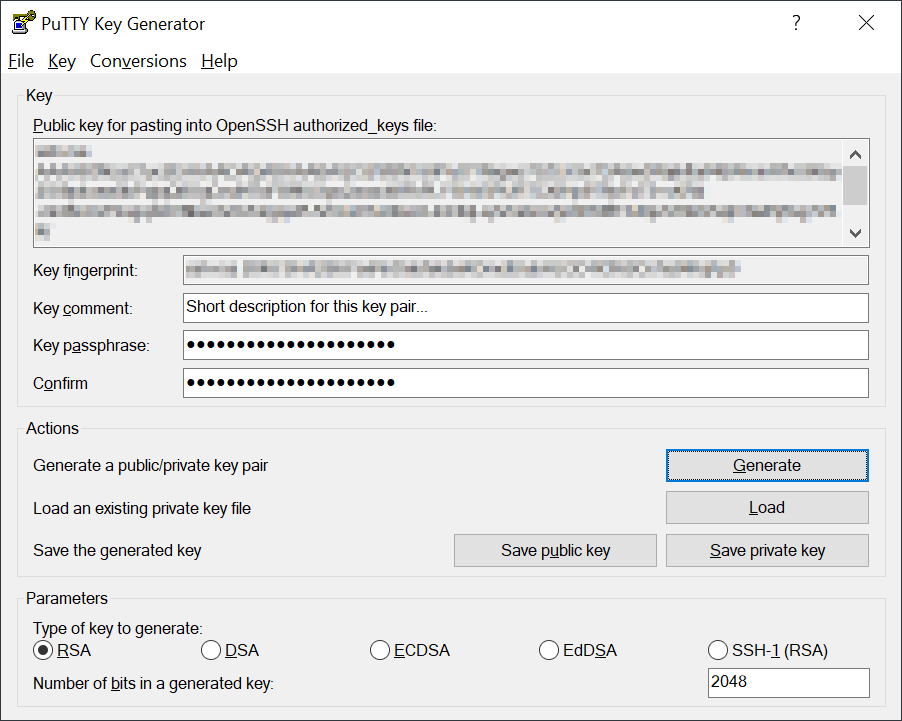
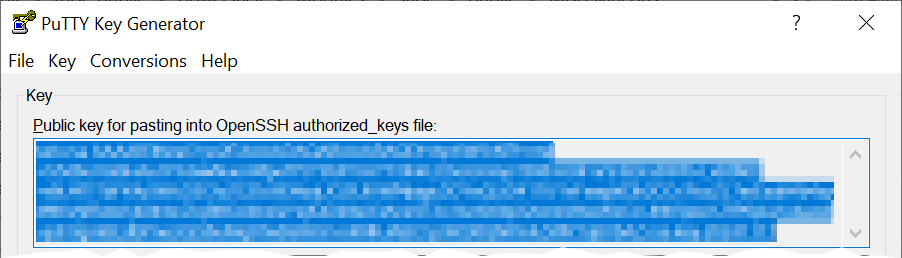
There is also Save public key (to a text file), but I don’t have good experiences with that, at least in relation with BitBucket (see next step); that’s why I usually skip it and load and copy the public key from the PPK file later, select it from there and copy-&-paste it:
- (A) Either pick Edit with PuTTYGen from the file’s context menu
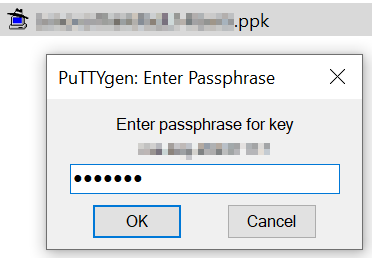
- (B) … or simply Load the file from within PuTTYgen





Deploy public SSH key to remote server
The public key must then be added to a server (or be linked to an account of the host of your remote Git repositories 👉 Add the public SSH key to the host of the Git repositories).
 Never deploy/publish your private key!
Treat a private SSH key like a password: Secure and private!
OpenSSH on Windows
The public key must then be added to a server (or linked to an account of the host of your remote Git repositories).
-
On/For Unix: Use
ssh-copy-id. -
On/For Windows:
ssh-copy-iddoes not come with “OpenSSH for Windows”; and it wouldn’t work, since that script internally executes some Unix shell commands on the server.
Workarounds:
PuTTY (Windows)
[TODO]
Configure
OpenSSH on Windows
By default OpenSSH for Windows stores its data in the directory .ssh/ in the user’s home directory:
-
The actual pair of key files: The private key and the public key (with the
*.pubsuffix at the filename). -
known_hosts: Saves the “fingerprint” of a server, with which one has had a first contact. -
configis an optional text file that can be created by the user to store settings (OpenBSD man page):Host <Label for this connection's settings> Hostname <FQDN/IP address/Name of the remote server> User <Username on the remote server> Port <Number of the port> PreferredAuthentications publickey PasswordAuthentication no IdentityFile <Path to the private SSH key> IdentitiesOnly yes- Regarding
IdentityFileandIdentitiesOnly:
Without it, a SSH client will not know which key matches to a server, so it must try all available keys. That can lead to (too) many unsuccessful authentication attempts. And a server has often a limit for how many of such attempts it will accept. If that limit is exceeded (if one has many keys), the user can’t log in to a server.
By specifying the correct key for a particular server in theconfigfile, this can be avoided. But note that withIdentityFileonly, this list of keys the client should try is only extended! To make sure that only the specified key is used,IdentitiesOnlymust also be set to yes.
- Regarding
PuTTY (Windows)
[TODO]
Load private SSH key into SSH agent
A SSH agent stores the private keys used for public key authentication in memory, so that one only has to enter the passphrase for the private keys once per session (at the start of the SSH agent).
OpenSSH on Windows
The easiest way to use a SSH key is to let it automatically be imported when Windows starts: Use [TODO] to load the private SSH key(s) automatically at the start of Windows.
[TODO]
- https://stackoverflow.com/questions/34638462/using-git-with-ssh-agent-on-windows
- https://peateasea.de/starting-ssh-agent-in-windows-powershell/
- https://interworks.com/blog/2021/09/15/setting-up-ssh-agent-in-windows-for-passwordless-git-authentication/
PuTTY (Windows)
The easiest way to use a SSH key is to let it automatically be imported when Windows starts:
Pageant is PuTTY’s authentication agent and can load the private SSH key(s) automatically at the start of Windows.
-
The Startup folder is no longer reachable via the Start Menu since Windows 10.
Instead, use Run… (Win+R) and entershell:startup
Or alternatively, go toC:\Users\<User>\AppData\Roaming\Microsoft\Windows\Start Menu\Programs\Startup -
In that folder, create a new shortcut that points to the “Pageant” executable:
Right click: New → Shortcut -
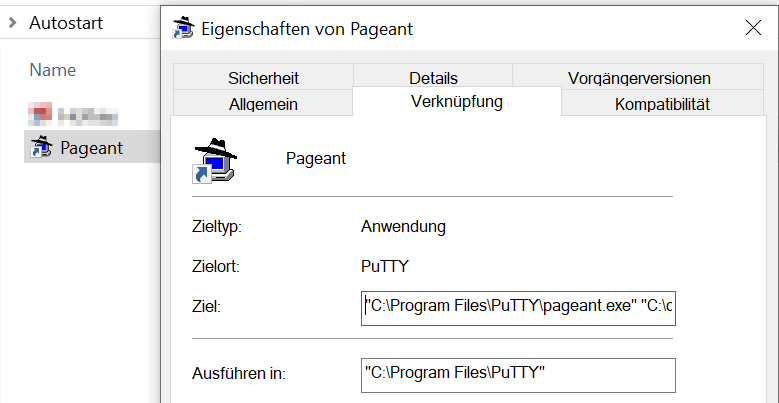
Edit the properties of this shortcut:
-
Set the target to the path where “Pageant” is installed; and provide the path(s) to the PPK file(s) as its command-line argument (multiple filepaths are separated by space. Pageant will try to use the same passphrase for all keys, and will ask otherwise):
Target:"C:\Program Files\PuTTY\pageant.exe" "C:\path\to\PrivateKey1.ppk" "C:\path\to\PrivateKey2.ppk" -
Or, if multiple PPK files should be loaded from the same folder, this can be shortened:
Target:"C:\Program Files\PuTTY\pageant.exe" PrivateKey1.ppk PrivateKey2.ppk
Start in:C:\path\to\
-
Working with Git hosting services
Add public SSH key
The public SSH key must be linked to your account with the host of your remote Git repositories.
Never deploy/publish your private key!Treat a private SSH key like a password: Secure and private!
BitBucket.org
-
Log in to BitBucket.org and go to your “Personal Settings”
(by clicking on your avatar in the lower left; or by clicking on the “Settings” cog symbol on the top navigation bar; or… – as websites go, this may have changed by now.) -
Select Security → SSH keys → Add key…
Gotcha: You’ll get an Invalid Key error if you copy the Public Key out of a saved text file.
Fix: Get the public key directly from PuTTYgen (see above).
See also (on support.atlassian.com): Provide Bitbucket Cloud with your public key.
GitLab.com
- Log in to GitLab.com and select your avatar on the left sidebar.
- Select “Edit Profile”; select “SSH Keys” (left sidebar); select “Add new key”; etc.
See also (on docs.gitlab.com): Add an SSH key to your GitLab account
Issues when trying to clone a repository
Error: Could not read from remote repository
> git clone git@bitbucket.org:saoe/REPO-X.git

Cloning into '<REPO-X>'...
git@bitbucket.org: Permission denied (publickey).
fatal: Could not read from remote repository.

Please make sure you have the correct access rights and the repository exists.
Fix: If you’re using “PuTTY” for key generation and client:
Tell Git for Windows that it should use PuTTY’s plink.exe for SSH tunneling:
Set the environment variable GIT_SSH to where it can find plink.exe (the user context is fine):
> [Environment]::SetEnvironmentVariable("GIT_SSH", "C:\Program Files\PuTTY\plink.exe", "User")
Error: The host key is not cached for this server
> git clone git@bitbucket.org:saoe/REPO-X.git

The host key is not cached for this server:
  bitbucket.org (port 22)
You have no guarantee that the server is the computer you think it is.
[...]
This is normal behaviour when it’s the first SSH contact with a server.
Fix: If you’re using “PuTTY” for key generation and client:
You need to acquaint PuTTY’s plink.exe with this host by calling it one time with that URL as its argument:
-
> &'C:\Program Files\PuTTY\plink.exe' bitbucket.org > &'C:\Program Files\PuTTY\plink.exe' gitlab.com -
Confirm with
Y(store key in cache) and skip the following “Login as:” prompt by hitting the RETURN key. -
After that, it should look like this (which is fine):
- BitBucket.org’s reply:
Access granted. Press Return to begin session. Server refused to allocate pty authenticated via ssh key. You can use git to connect to Bitbucket. Shell access is disabled - GitLab.com’s reply (yet OK):
FATAL ERROR: No supported authentication methods available (server sent: publickey)
- BitBucket.org’s reply:
Now you should be able to clone repos and commit and push changes to your remote repositories on BitBucket.org
Film & Television (58)
How To (74)
Journal (18)
Miscellaneous (4)
News & Announcements (21)
On Software (12)
Projects (26)